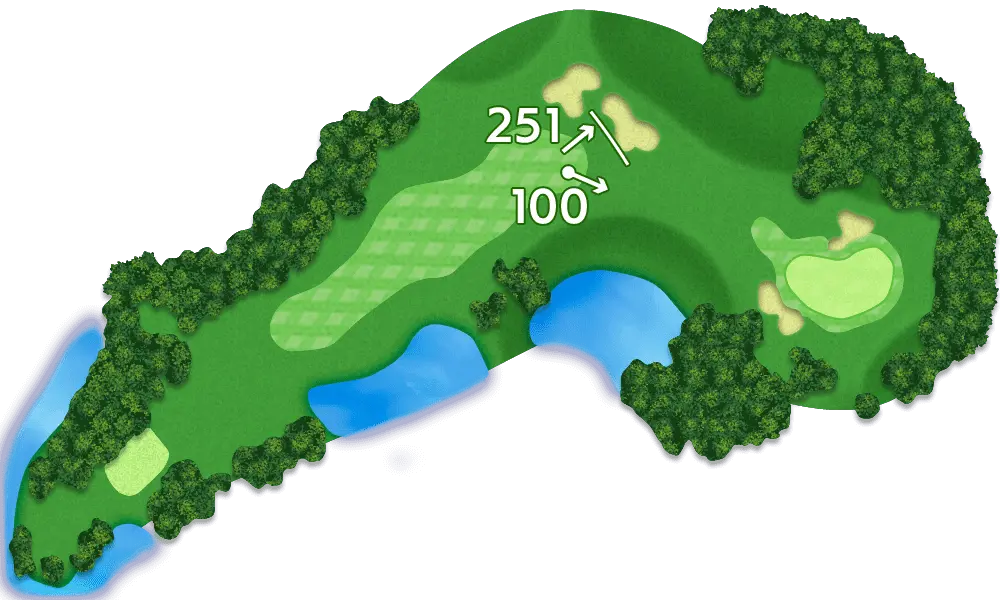
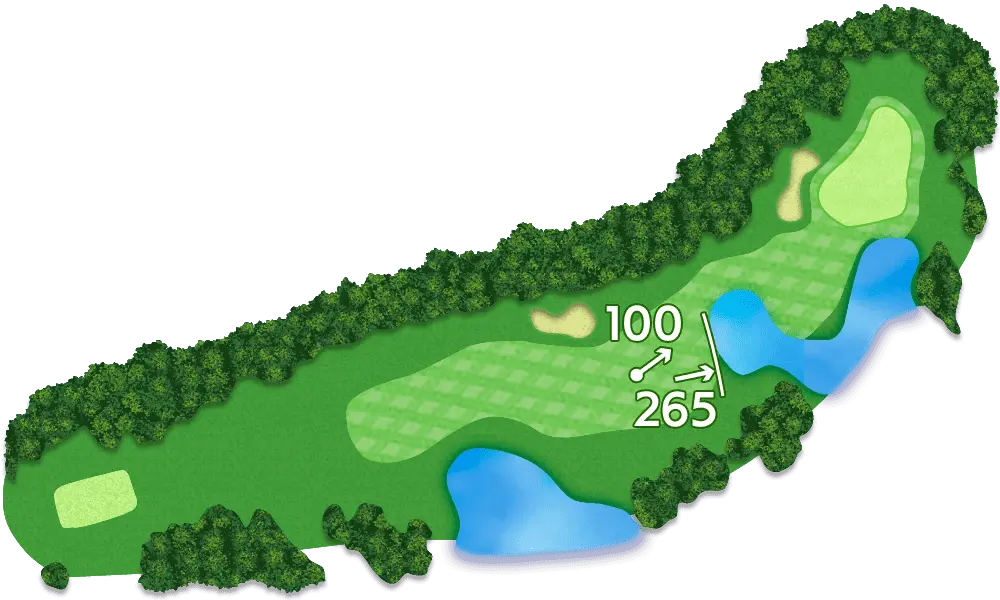
COURSE
HOLE1 PAR 4
495 YARDS
A reachable par-5 for long hitters, the key is to carry the tee shot to the left side. Sloping down to the left in front of the green, the second shot to the right side is crucial for making the score.
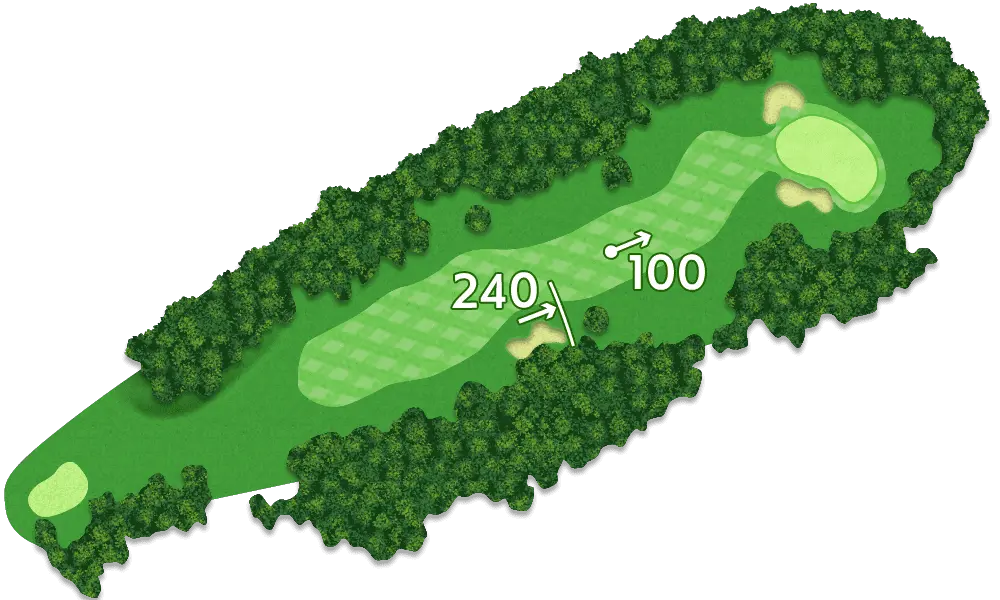
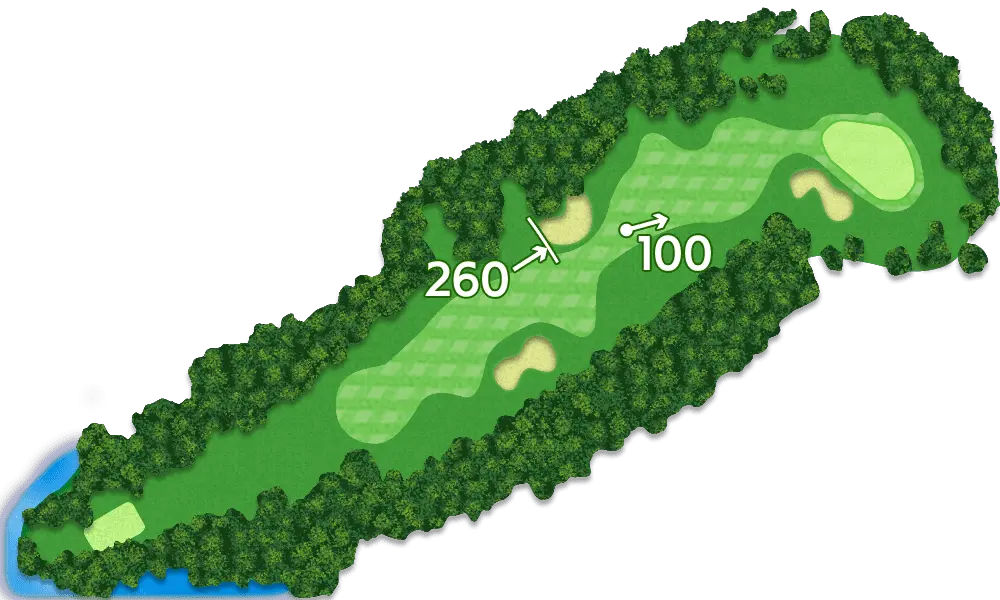
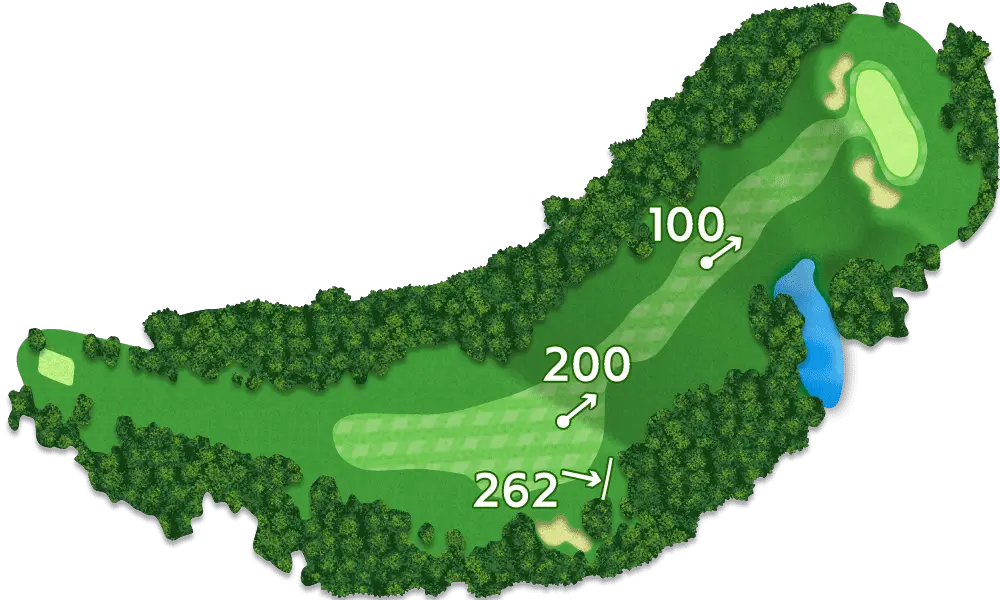
HOLE2 PAR 5
393 YARDS
A dogleg-right par 4, many players aim tee shots to the foot of the right hill. An aggressive line over the trees can be a shortcut for long hitters.
HOLE3 PAR 3
185 YARDS
A long, downhill par 3. A bunker in front of the green makes this hole challenging, where the tee shot must hit the green.
HOLE4 PAR 4
400 YARDS
A long par 4 where the green is guarded by three bunkers. An accurate second shot to the green is crucial to make the score.
HOLE5 PAR 4
389 YARDS
With 8 yards uphill to the green, the green is almost invisible from the second shot. Additionally, with a mound behind the green, precise distance control is crucial for the second shot.
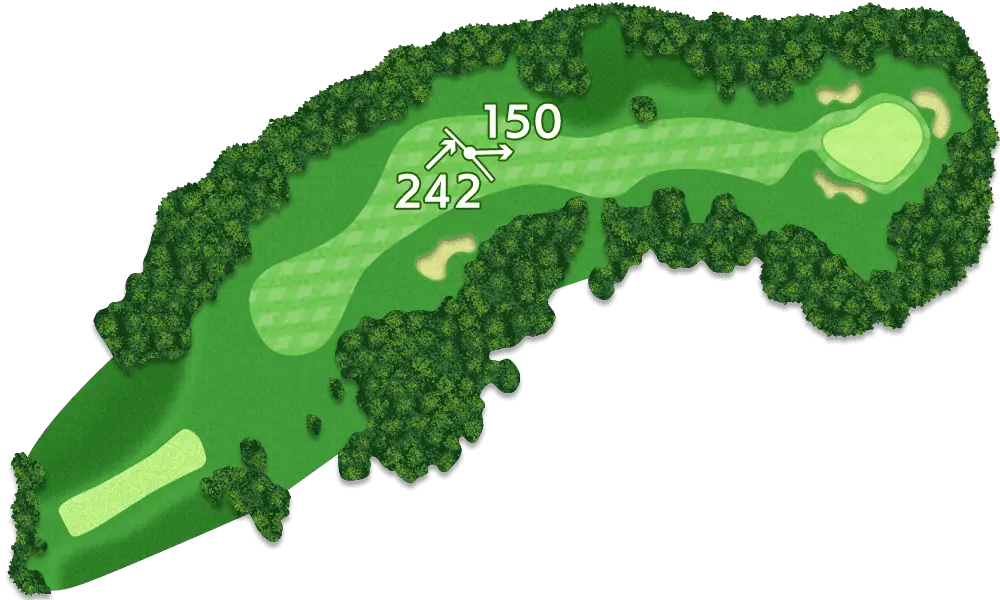
HOLE6 PAR 4
350 YARDS
With a limited flat surface on the second shot location of the fairway, where to carry the tee shot is the key. This hole is not so long, so an accurate second shot can set up birdie chances.
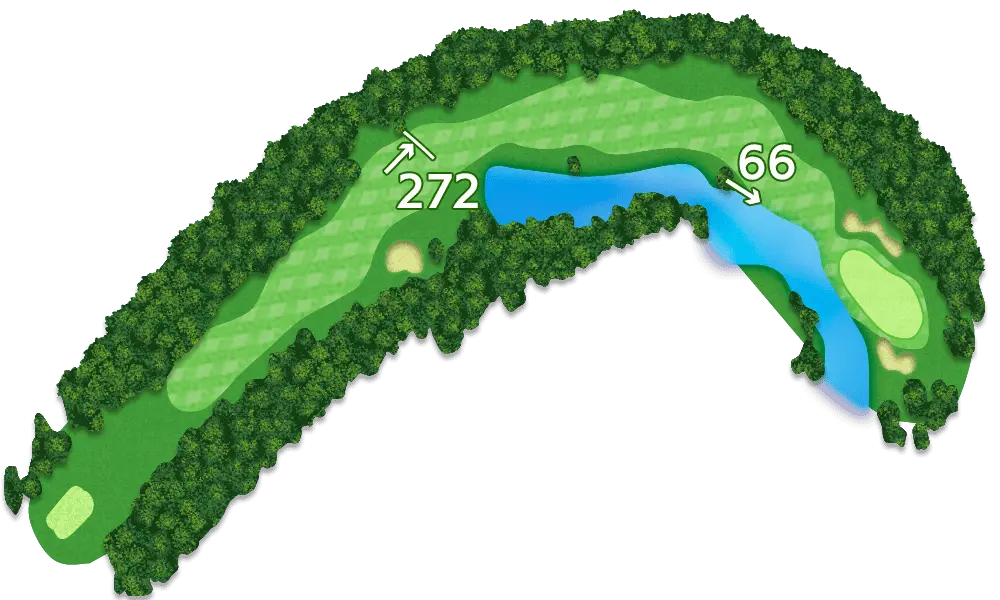
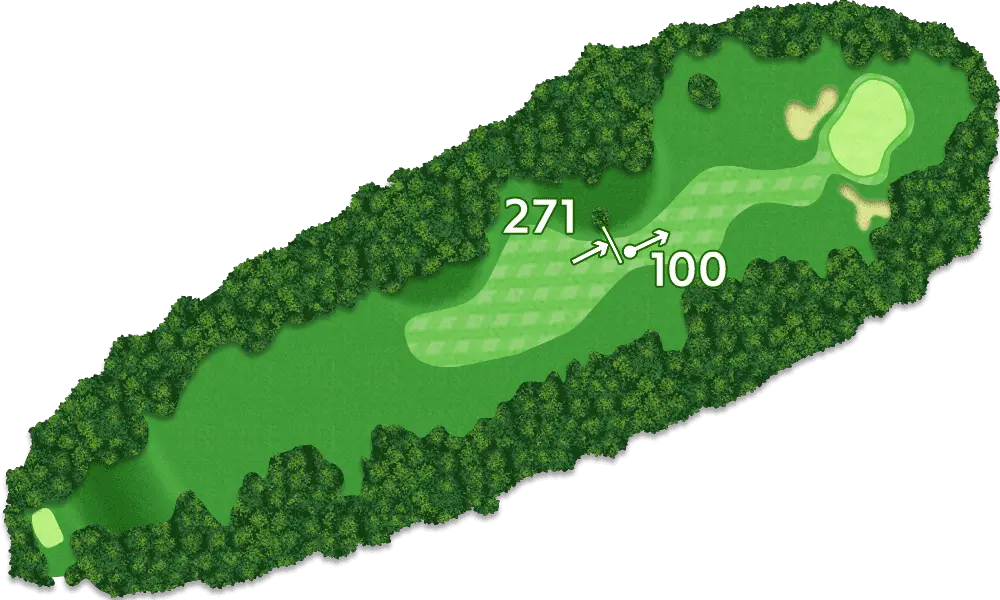
HOLE7 PAR 4
399 YARDS
A dogleg-left par 4, a deep ravine, "Witch's Valley," to the left side of the second shot area instills fear in players. Hitting right will leave a long distance to the green, so an accurate tee shot is required.
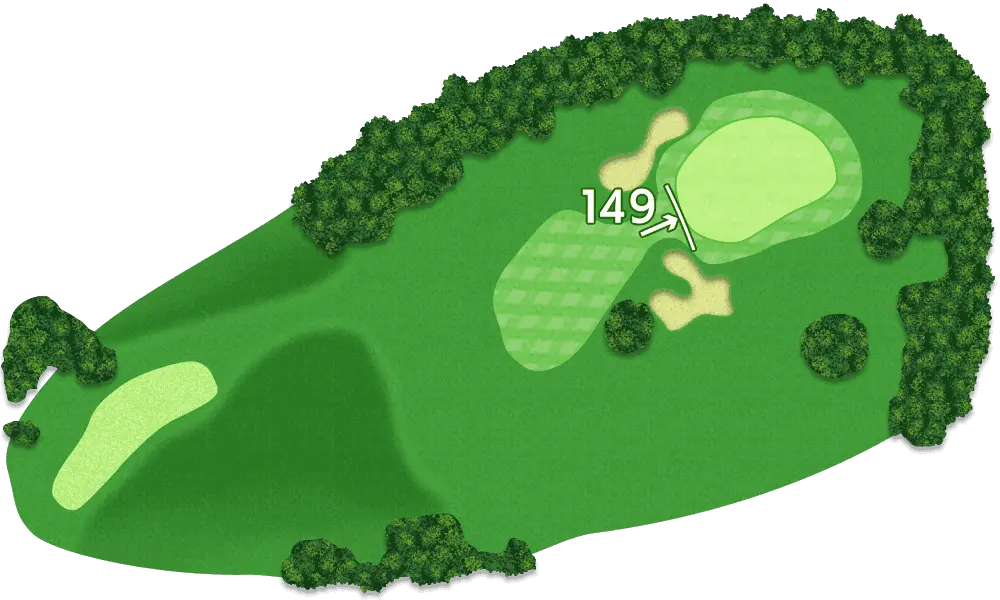
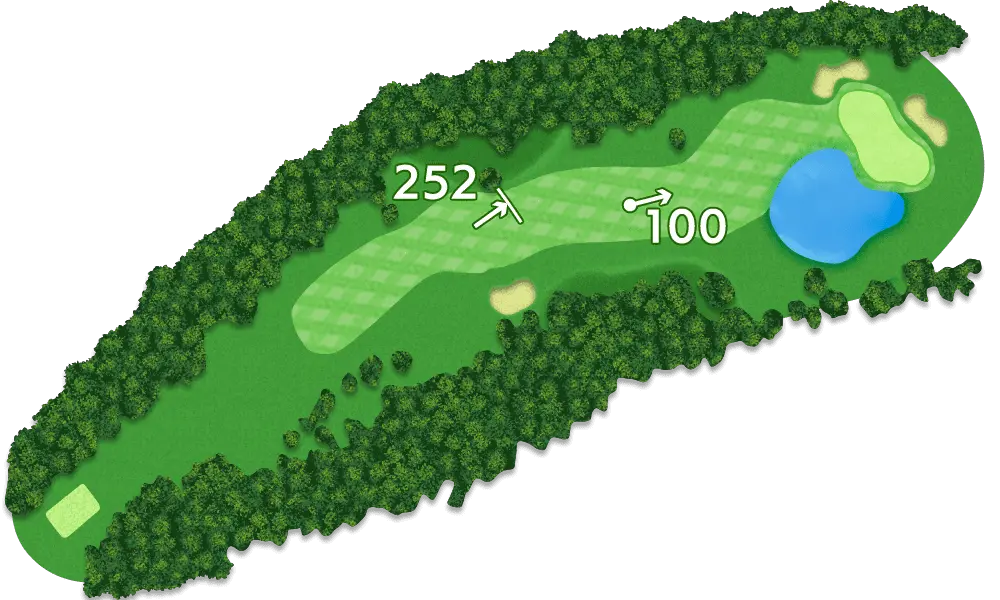
HOLE8 PAR 3
177 YARDS
A 6-yard downhill par 3; the large green makes it easier to aim for birdies.
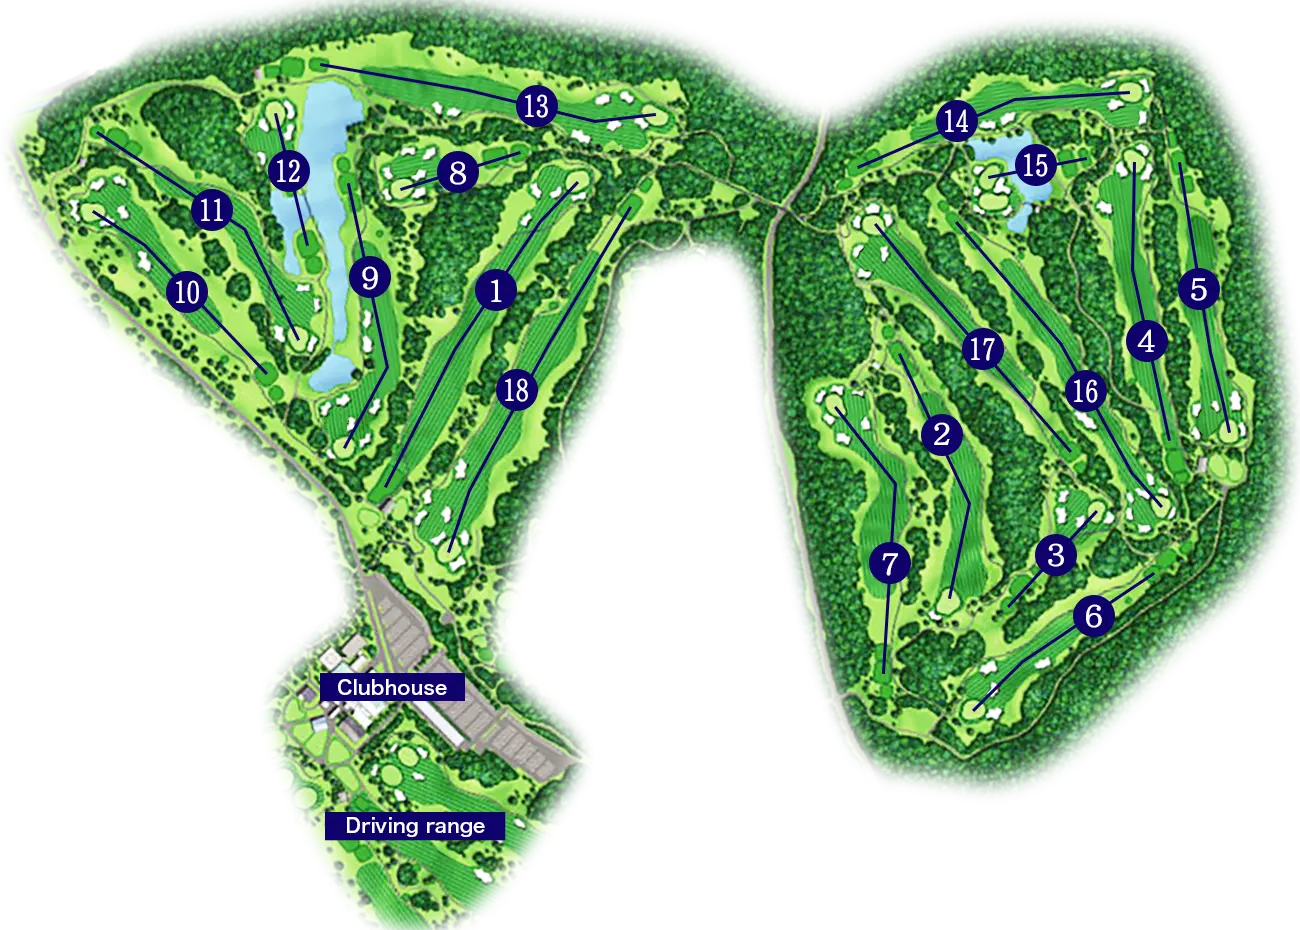
HOLE9 PAR 5
392 YARDS
Although a short par 4, the elevation on the green makes this hole challenging. The precision with an iron on the second shot and delicate putting on the green is essential.
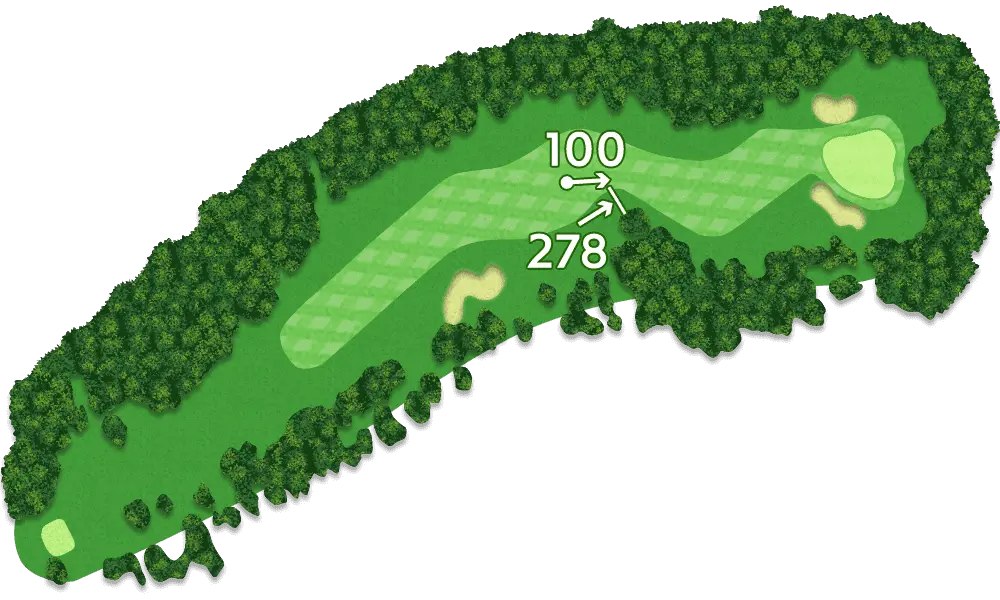
HOLE10 PAR 4
367 YARDS
A gentle downhill par 4; with a cross bunker on the left, the tee shot is to be aimed slightly to the right. The second shot should be aimed dead at the pin with a short iron.
HOLE11 PAR 4
406 YARDS
A dogleg-right par 4, the fairway slopes from right to left. The tee shot is to be aimed at the foot of the right hill. The second shot will be from an uphill lie, targeting an elevated green, making this the toughest hole at Seta Golf Course.

HOLE12 PAR 5
192 YARDS
No time to catch a breath after a challenging hole, concentrating on the tee shot to hit the green is crucial for a par save on this long par 3.
HOLE13 PAR 3
476 YARDS
An uphill par 5 from the tee to the green; the green is reachable in two for long hitters. With an elongated green with challenging undulations, a thrilling touch is a must
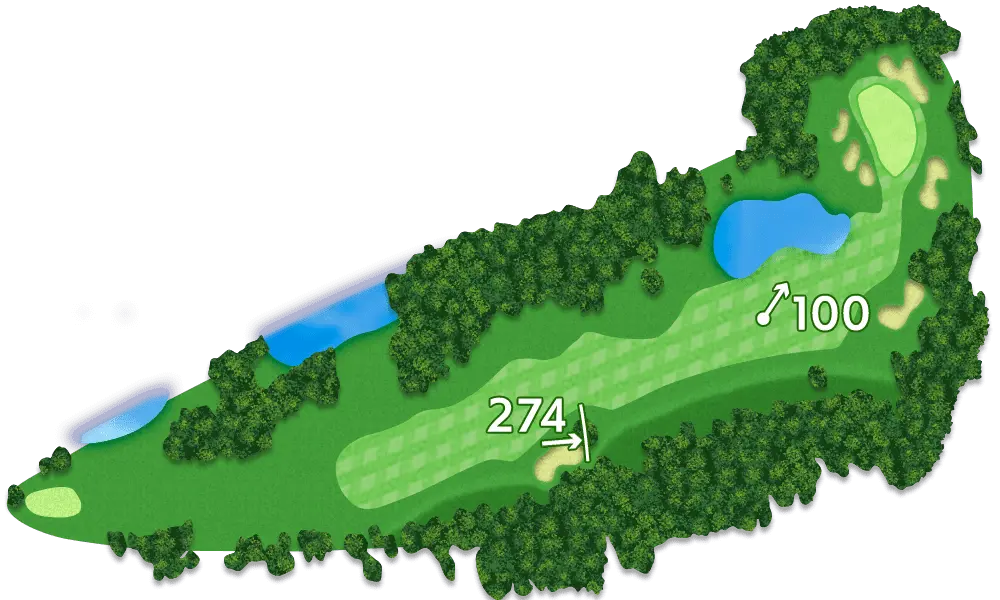
HOLE14 PAR4
411 YARDS
Most players aim their tee shot next to the cross bunker. A long iron or fairway wood is required to ensure the 5-yard uphill second shot hits the green.
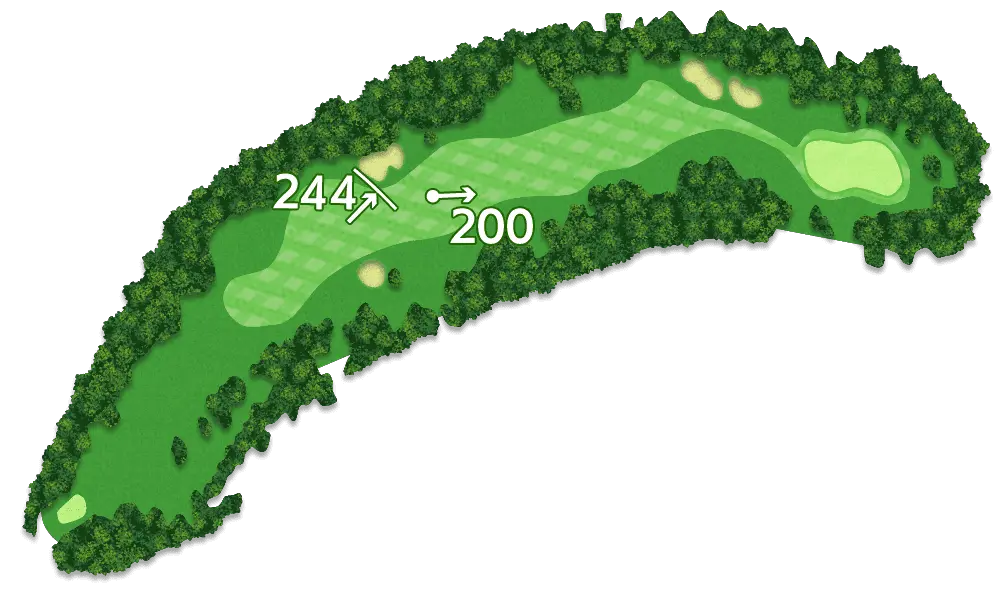
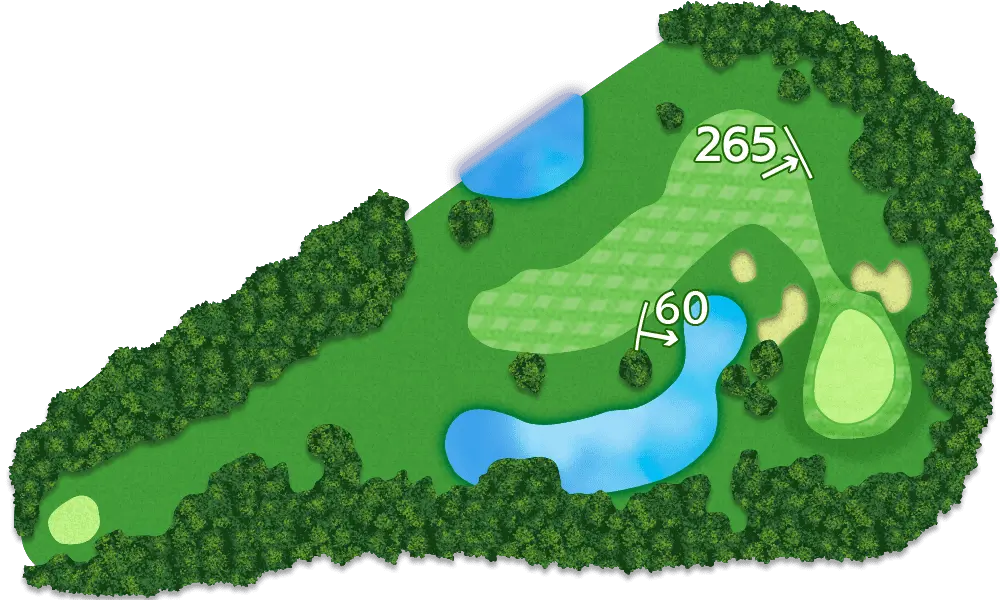
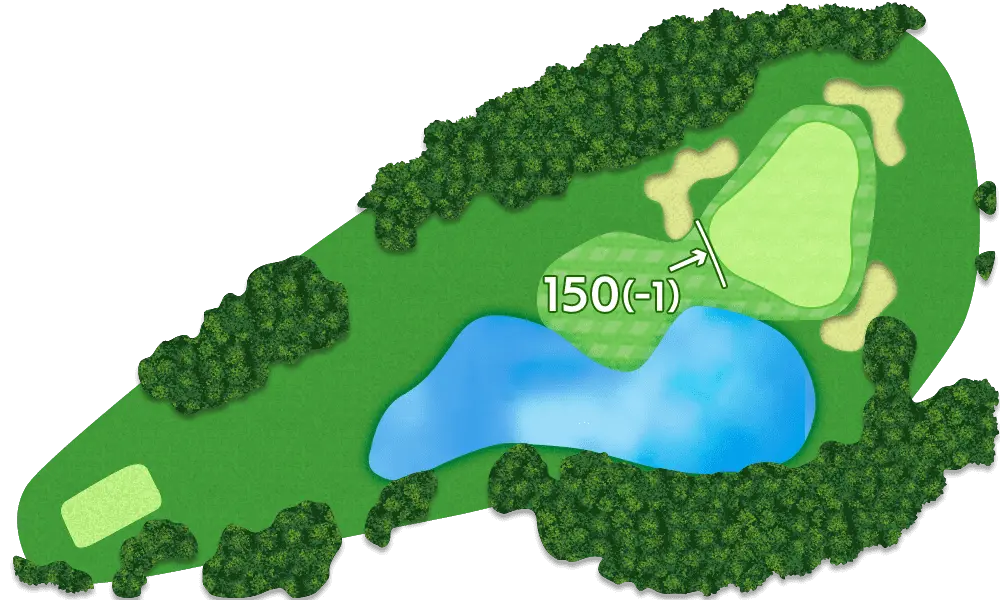
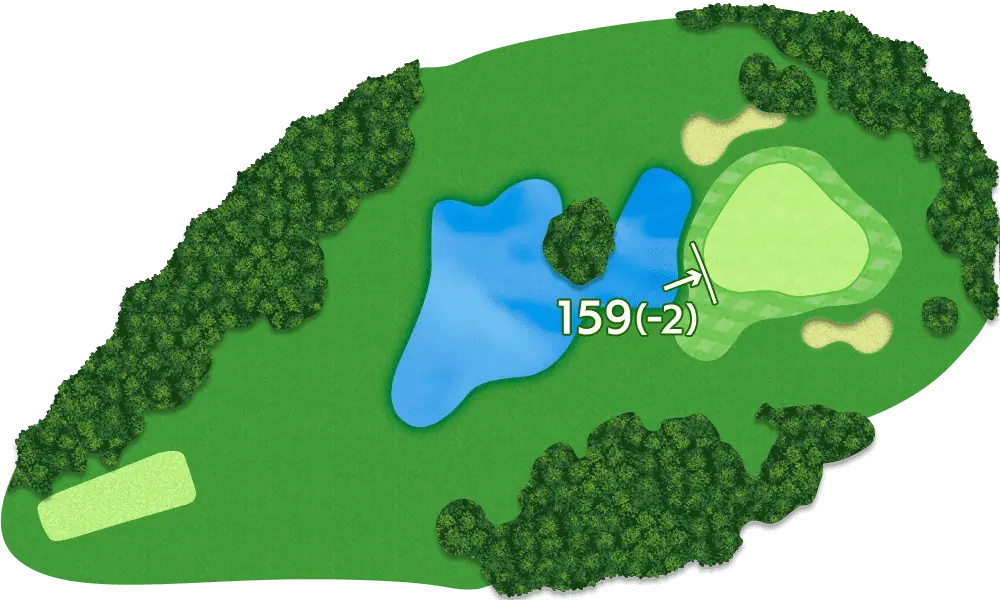
HOLE15 PAR 4
135 YARDS
A par 3 with a large water hazard spanning from the tee to the green. The front of the green slopes towards the water, so a short tee shot increases the risk of ending up in the water hazard.
HOLE16 PAR 3
500 YARDS
Though surrounded by four greenside bunkers, this hole is reachable in two, where all players count on birdies
HOLE17 PAR 5
409 YARDS
The landing area isn't visible from the teeing ground, but the center is to be aimed at. Downhill from the second shot to the green, careful club selection is the key.
HOLE18 PAR 4
540 YARDS
A par 5 where many players play the game on the third shot. To finish a day with a birdie, aim at the pin dead with a wedge.
- TOTO JAPAN CLASSIC Convention Secretariat
- tjc@mbs.co.jp